Introduction
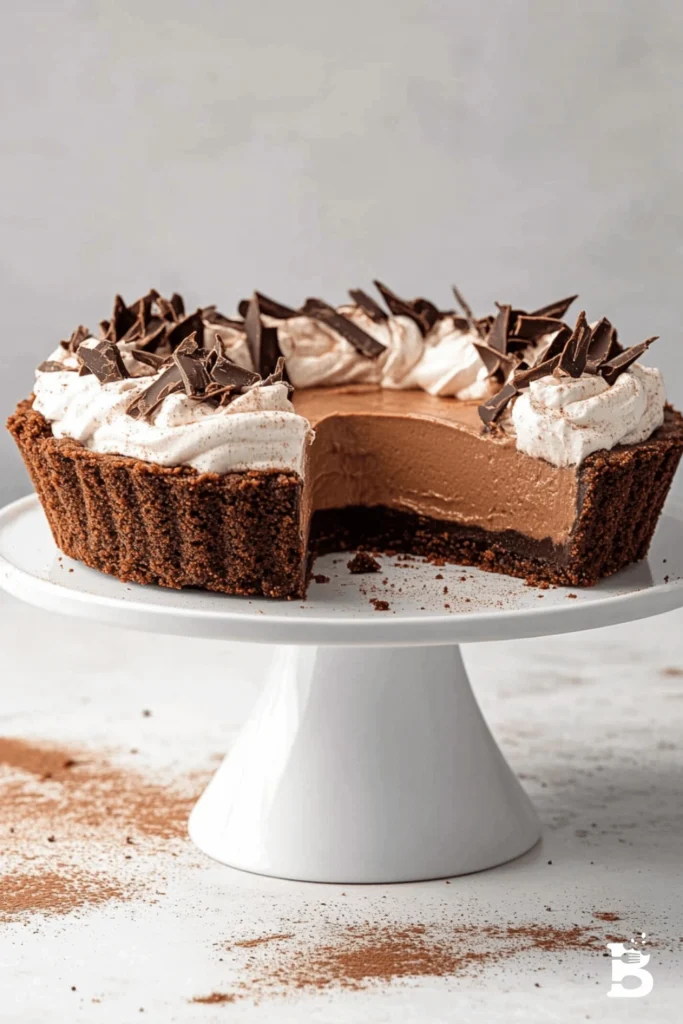
If you’re a chocolate lover, prepare to fall in love with chocolate mousse pie—a rich, creamy, and utterly indulgent dessert that combines the velvety smoothness of chocolate mousse with the buttery crispness of a pie crust. This decadent treat is perfect for any occasion, whether serving at a holiday gathering, a dinner party, or simply satisfying a chocolate craving.
What makes this pie stand out? The perfect balance of textures is a luscious, airy mousse nestled in a flaky or crunchy crust, often topped with a dollop of whipped cream or a sprinkle of chocolate shavings. The best part? It’s easier to make than you might think! Even if you’re not an experienced baker, this recipe is beginner-friendly, with simple steps and readily available ingredients.
This guide explains everything you need to know about making the perfect chocolate mousse pie—from ingredients and step-by-step instructions to variations, storage tips, and serving suggestions. Whether you prefer a traditional graham cracker crust or a more adventurous Oreo base, this pie is endlessly customizable.
So, grab your favorite chocolate and get ready to whip up a dessert guaranteed to impress!
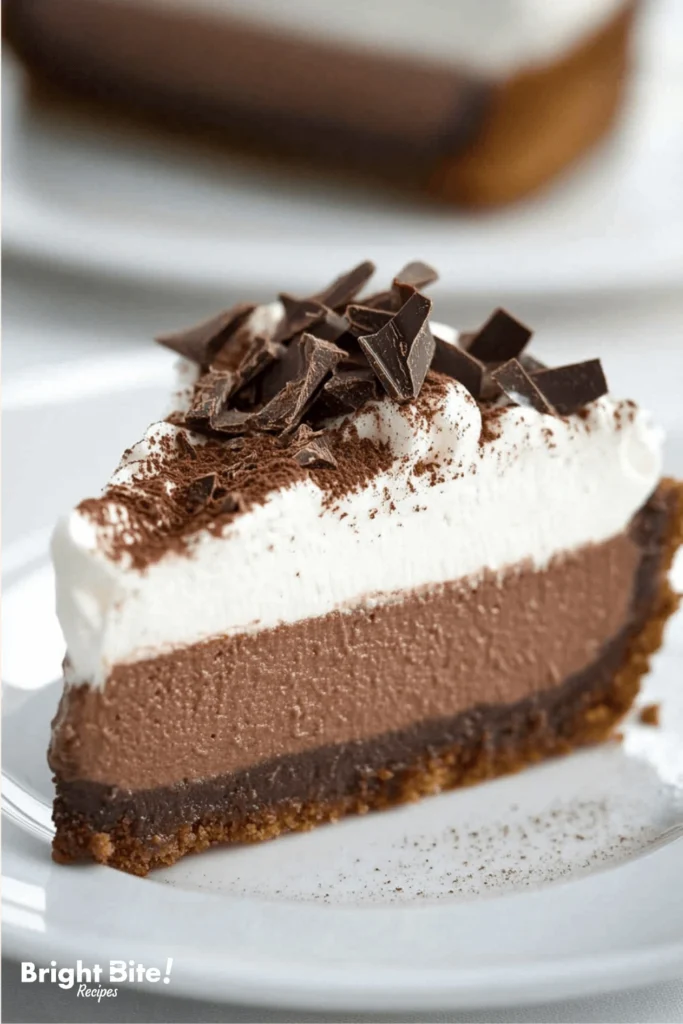
Table of Contents
Why You’ll Love This Recipe
There are plenty of reasons to adore this chocolate mousse pie, but here are the top highlights that make it truly special:
- Incredibly Smooth and Creamy – The mousse filling is light yet rich, melting in your mouth with every bite.
- Perfect for Chocolate Lovers – It’s packed with deep, chocolatey goodness, satisfying even the most intense cravings.
- Make-Ahead Friendly – You can prepare this pie in advance, making it ideal for entertaining or special occasions.
- Simple Yet Elegant – While it looks fancy, it’s surprisingly easy to make with just a few ingredients.
- Customizable – Change the crust and toppings, or add flavors like espresso or orange zest to make it your own.
Whether you’re looking for a dessert to wow your guests or just want a luxurious treat for yourself, this pie checks all the boxes.
Detailed Ingredients and Instructions
Before we dive into the recipe card, let’s go over everything in detail to ensure you achieve the best results.
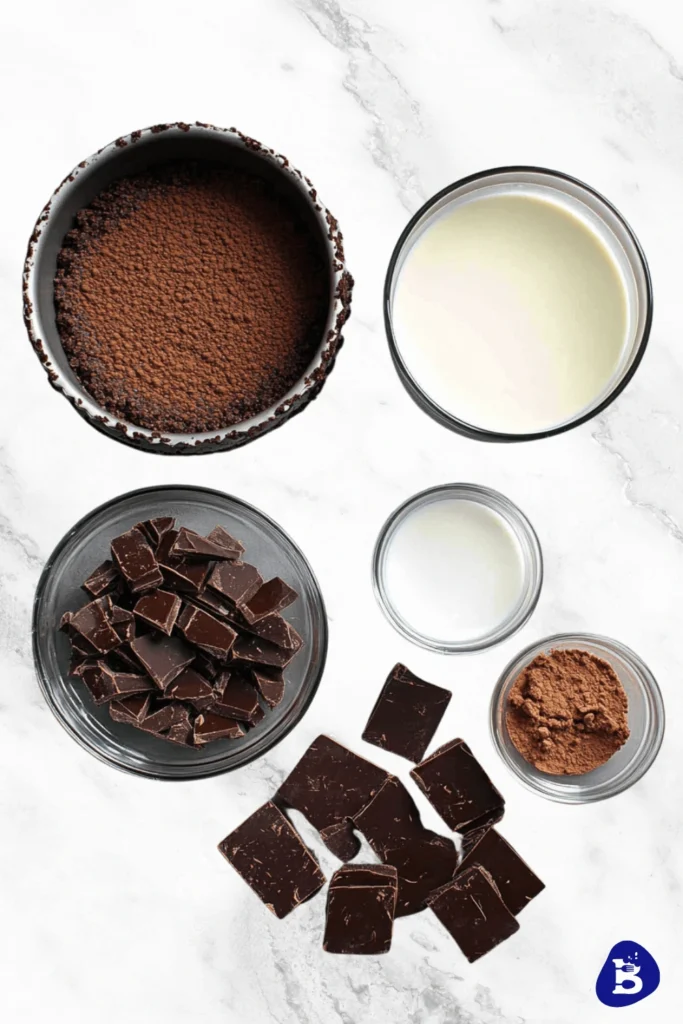
Ingredients Breakdown
To make the ultimate chocolate mousse pie, you’ll need the following:
For the Crust:
- Graham crackers or Oreos – The base of your pie; choose your favorite for a classic or chocolatey twist.
- Butter – Helps bind the crust together and adds richness.
- Sugar (optional) – Enhances the sweetness but can be omitted for a more balanced flavor.
For the Chocolate Mousse Filling:
- Dark or semisweet chocolate – The star of the show! High-quality chocolate makes all the difference.
- Heavy whipping cream – Whipped to perfection, this gives the mousse a light, airy texture.
- Eggs – A key component for structure and silkiness (we’ll discuss an egg-free version later).
- Sugar – Just a touch to enhance the chocolate’s depth.
- Vanilla extract – Rounds out the flavors beautifully.
- Salt – A pinch goes a long way in balancing the sweetness and enhancing the chocolate.
For Topping (Optional):
- Whipped cream – Light and fluffy, it complements the mousse perfectly.
- Chocolate shavings – For an elegant and irresistible finishing touch.
Step-by-Step Instructions
1. Prepare the Crust
- Crush the graham crackers or Oreos until they become fine crumbs. A food processor works best, but you can also use a rolling pin and a ziplock bag.
- Mix the crumbs with melted butter (and sugar, if using) until well combined. The mixture should resemble wet sand.
- Press the mixture firmly into a pie dish, covering the bottom and sides evenly.
- Bake at 350°F for 8-10 minutes, then let it cool completely before adding the filling.
2. Make the Chocolate Mousse
- Melt the chocolate using a double boiler or in short microwave intervals, stirring until smooth. Let it cool slightly.
- In a separate bowl, beat the eggs with sugar over a simmering pot of water (double boiler method) until they become thick and pale. This helps create a stable mousse.
- Gently fold the melted chocolate into the egg mixture until well incorporated.
- In another bowl, whip the heavy cream until stiff peaks form.
- Carefully fold the whipped cream into the chocolate mixture, being cautious not to deflate the mousse.
3. Assemble and Chill
- Pour the mousse into the cooled crust, smoothing the top with a spatula.
- Refrigerate for at least 4 hours (or overnight) to allow the mousse to set properly.
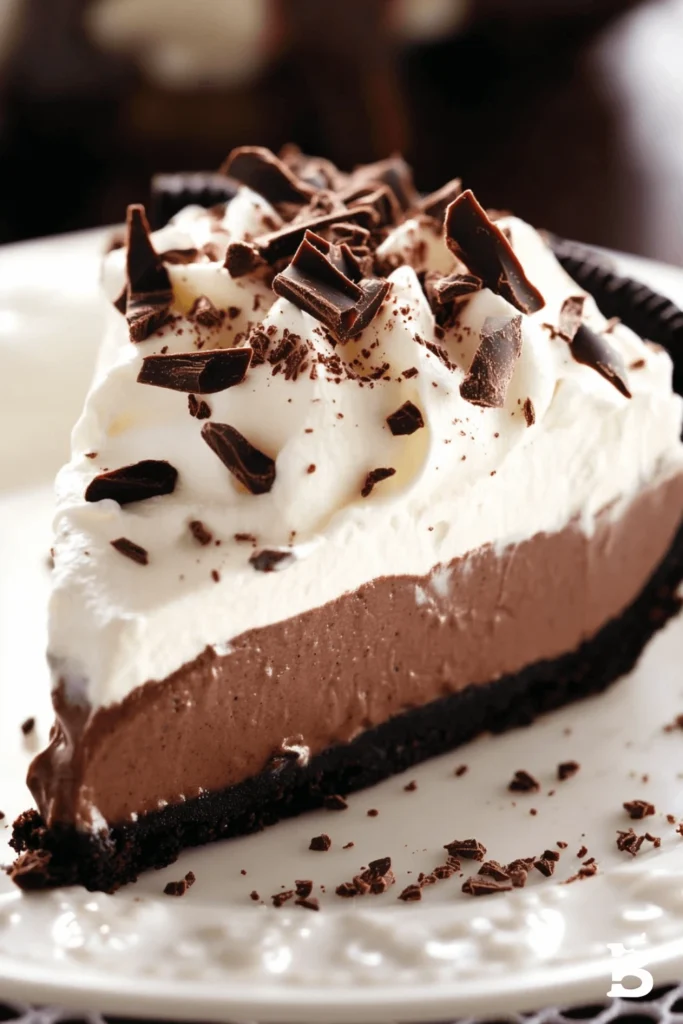
- Before serving, garnish with whipped cream and chocolate shavings for an extra indulgence.

Tips, Variations, and Storage Options
Expert Tips for a Perfect Chocolate Mousse Pie
To make sure your chocolate mousse pie turns out perfect every time, follow these expert tips:
- Use High-Quality Chocolate – Since chocolate is the star ingredient, opt for a premium brand with at least 60% cocoa for deep, rich flavor.
- Let the Chocolate Cool Slightly – Adding hot melted chocolate to whipped cream can cause the mixture to deflate or seize. Allow it to cool slightly before folding it in.
- Chill the Bowl and Whisk for Whipped Cream – A cold mixing bowl helps the heavy cream whip up faster and hold its shape better.
- Fold Gently – When incorporating the whipped cream into the chocolate mixture, use a gentle folding motion to maintain the mousse’s airy texture.
- Allow Ample Chilling Time – The mousse needs at least 4 hours in the fridge to set properly. For best results, chill it overnight.
Variations to Try
One of the best things about chocolate mousse pie is how customizable it is! Here are a few variations you can try:
Crust Variations
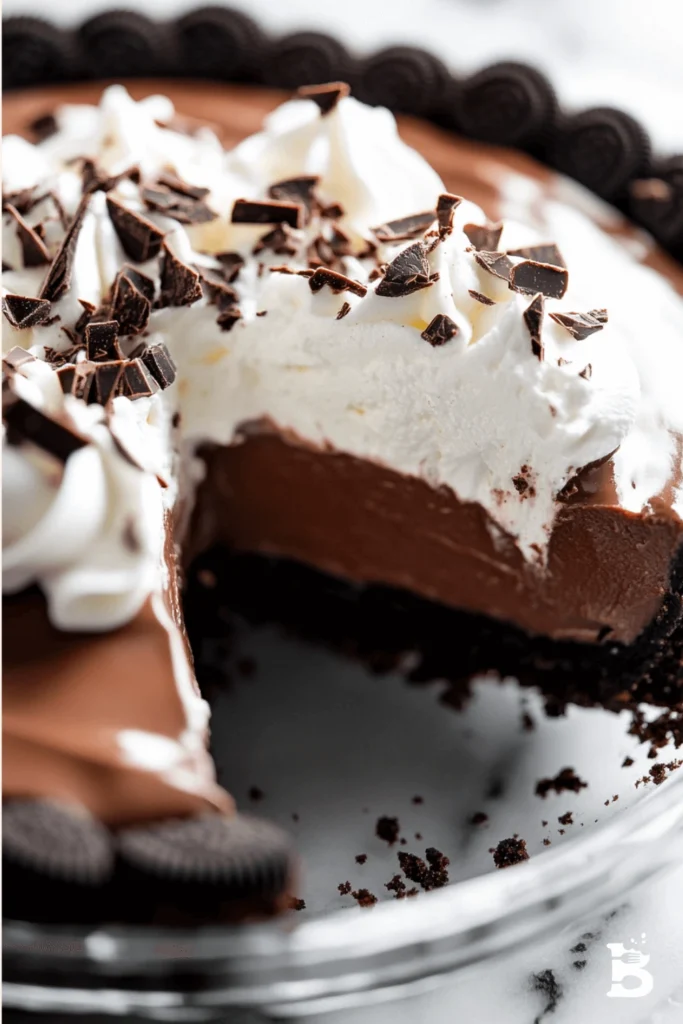
- Oreo Crust – Swap out graham crackers for crushed Oreos to enhance the chocolate flavor.
- Shortbread Crust – A buttery shortbread crust adds a deliciously crisp contrast to the smooth mousse.
- Nut Crust – Combine ground almonds, pecans, or hazelnuts with butter for a gluten-free option with added crunch.
Flavor Enhancements
- Espresso-Infused – Add 1 teaspoon of instant espresso powder to the chocolate mixture for a deeper, bolder taste.
- Mint Chocolate – Stir in ½ teaspoon of peppermint extract for a refreshing twist.
- Orange Zest – A fresh orange zest brightens the chocolate’s richness beautifully.
Topping Ideas
- Salted Caramel Drizzle – Adds a sweet and salty contrast that enhances the chocolate flavor.
- Berries – Fresh raspberries or strawberries provide a tart, fruity balance to the pie’s richness.
- Chopped Nuts – Toasted hazelnuts, pecans, or almonds add extra crunch and depth.
How to Store Chocolate Mousse Pie
Refrigeration:
- Store the pie in the refrigerator, covered loosely with plastic wrap or foil.
- It stays fresh for up to 4 days, though the mousse may soften slightly over time.
Freezing:
- You can freeze chocolate mousse pie for up to 2 months.
- Wrap it tightly in plastic wrap, then cover it with foil to prevent freezer burn.
- Thaw it in the fridge overnight for the best texture when ready to serve.
Equipment Needed
To make this chocolate mousse pie, you’ll need a few essential kitchen tools:
- Mixing Bowls – For whipping cream and preparing the mousse.
- Electric Mixer or Whisk – Helps achieve the perfect fluffy texture for the whipped cream.
- Spatula – Ideal for folding ingredients without deflating the mousse.
- Food Processor (Optional) – Speeds the crust-making process by finely grinding cookies or crackers.
- Pie Dish – A standard 9-inch pie dish works best for this recipe.
Related Recipes
If you love chocolate mousse pie, you might also enjoy these similar desserts:
Classic French Chocolate Mousse
A traditional, silky chocolate mousse served in individual cups for an elegant presentation.
No-Bake Cheesecake with Chocolate Crust
A creamy, no-bake cheesecake with a rich chocolate cookie crust—perfect for effortless entertaining.
Chocolate Lava Cakes
Individual chocolate cakes with a gooey, molten center that oozes with rich chocolate goodness.
Triple Chocolate Tart
A decadent tart featuring three layers of chocolate: ganache, mousse, and a crisp chocolate crust.
Pairing and Serving Suggestions
A chocolate mousse pie is already an indulgent dessert, but pairing it with the right accompaniments can further elevate the experience. Whether you’re serving it at a dinner party or enjoying it as a treat for yourself, these ideas will help you create the perfect dessert presentation.
Best Drinks to Serve with Chocolate Mousse Pie
Pairing the right drink with chocolate mousse pie can enhance its rich flavors and balance the sweetness. Here are some great options:
- Coffee or Espresso – The bitterness of black coffee or espresso contrasts beautifully with the creamy, sweet mousse.
- Red Wine – A glass of Cabernet Sauvignon, Merlot, or Zinfandel pairs wonderfully with dark chocolate desserts.
- Milk – A classic choice! A cold glass of milk complements the pie’s richness perfectly.
- Hot Chocolate – For the ultimate chocolate lover’s experience, pair your pie with a warm, frothy cup of hot chocolate.
- Baileys or Kahlúa – A splash of Irish cream or coffee liqueur served over ice makes for a luxurious pairing.
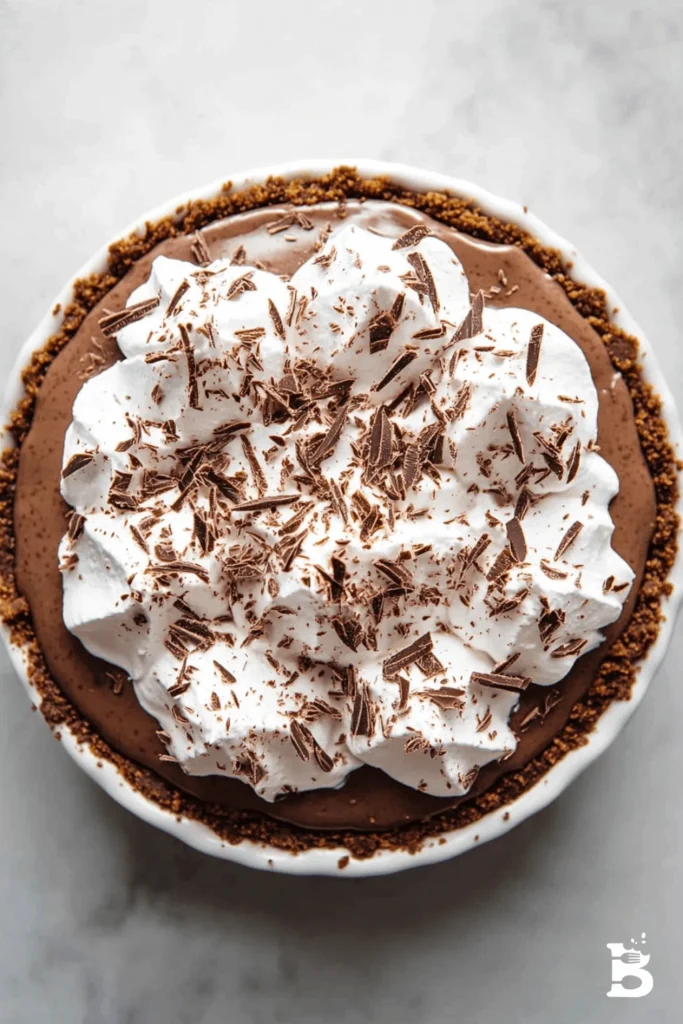
Toppings and Garnishes for an Elegant Touch
Want to make your chocolate mousse pie look extra special? Try these delicious toppings and garnishes:
- Chocolate Shavings – Use a vegetable peeler to create delicate chocolate curls for an elegant look.
- Whipped Cream Swirls – Pipe dollops of freshly whipped cream on top for added creaminess.
- Fresh Berries – Raspberries, strawberries, or blueberries provide a tart contrast to the rich chocolate.
- Caramel or Chocolate Drizzle – A caramel or melted chocolate drizzle enhances the visual appeal and adds extra flavor.
- Crushed Nuts – Toasted hazelnuts, almonds, or pecans add a delightful crunch.
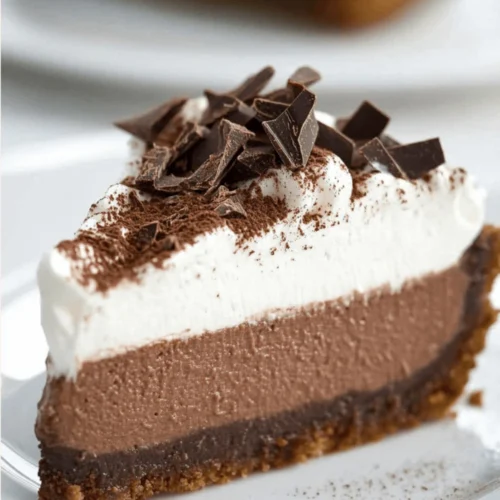
How to Serve Chocolate Mousse Pie Like a Pro
- Use a Warm Knife for Clean Slices – Dip a sharp knife in hot water, wipe it dry, and slice the pie cleanly. Repeat between cuts for the best results.
- Serve Chilled for the Best Texture – A well-chilled pie holds its shape better and offers a more refreshing contrast to the rich mousse.
- Plate with a Decorative Touch – Serve each slice with a drizzle of sauce, a dusting of cocoa powder, or a sprig of mint for a restaurant-worthy presentation.
Frequently Asked Questions
1. Can I Make Chocolate Mousse Pie Without Eggs?
Yes! You can replace the eggs with extra whipped cream or gelatin for structure. Using gelatin ensures the mousse holds its shape while remaining light and creamy.
2. What’s the Best Chocolate to Use for This Pie?
Use dark or semisweet chocolate with at least 60% cocoa content for a rich and luxurious flavor. Avoid using milk chocolate, as it may make the mousse too sweet.
3. Can I Make This Pie in Advance?
Absolutely! Chocolate mousse pie is a great make-ahead dessert. Prepare it a day before serving and keep it refrigerated until ready.
4. How Can I Make a Dairy-Free Version?
For a dairy-free alternative:
- Use coconut cream instead of heavy whipping cream.
- Choose dairy-free dark chocolate (many brands offer vegan options).
- Swap butter for coconut oil in the crust.
5. How Do I Fix a Runny Mousse?
If your mousse is too soft or runny:
- Make sure the chocolate is cooled before folding it into the whipped cream.
- Whip the cream to stiff peaks for a firmer consistency.
- Chill the mousse longer (overnight is best for full firmness).
Nutrition Information
A typical serving of chocolate mousse pie (based on an 8-slice pie) contains approximately:
- Calories: ~350-400 kcal
- Protein: ~5g
- Carbohydrates: ~30g
- Fats: ~25g
- Sugar: ~20g
Note: Nutrition values may vary based on ingredients and portion sizes.
Seasonal and Occasion Variations
One of the best things about chocolate mousse pie is that it can be adapted for different seasons and special occasions. Whether you’re making it for the holidays, summer gatherings, or a romantic dinner, these creative variations will add a festive touch to your dessert.
Holiday-Themed Chocolate Mousse Pie
Christmas Version:
- Add ½ teaspoon of peppermint extract to the mousse for a festive, minty twist.
- Top with crushed candy canes and a drizzle of white chocolate.
- Serve with homemade hot cocoa for a cozy holiday treat.
Valentine’s Day Version:
- Use raspberry or strawberry puree to create a heart-shaped swirl on top of the pie.
- Decorate with dark chocolate-dipped strawberries for an extra romantic touch.
- Serve with a glass of red wine or a chocolate espresso martini.
Thanksgiving Version:
- Add a hint of cinnamon and nutmeg to the chocolate mousse for a warm, spiced flavor.
- Pair with a pecan or gingersnap crust instead of graham crackers.
- Serve with salted caramel sauce for an extra indulgent finish.
Summer and Spring Variations
Lighter Summer Version:
- Use white chocolate instead of dark chocolate for a lighter, creamier texture.
- For a refreshing twist, top with fresh mango slices, passionfruit, or lemon zest.
- Serve chilled with iced coffee or fruit-infused sparkling water.
Spring Floral Infusion:
- Add a touch of lavender extract to the mousse for a floral, sophisticated flavor.
- Decorate with edible flowers such as violets or rose petals for a beautiful spring dessert.
- Serve with chilled chamomile or jasmine tea for a delicate pairing.
My Recipe Tips
To make sure your chocolate mousse pie turns out flawless every time, here are some extra pro tips:
Avoiding Common Mistakes
- Don’t Overheat the Chocolate: If the chocolate is too hot when mixed with other ingredients, it can cause the mousse to separate. Let it cool slightly before incorporating.
- Make Sure Your Cream Is Cold: Warm cream won’t whip properly. Always chill your heavy cream and mixing bowl before whipping.
- Be Gentle When Folding: Overmixing will deflate the whipped cream, making the mousse dense instead of light and airy. Use slow, gentle folding motions.
- Give It Enough Time to Set: While it may be tempting to dig in right away, chilling for at least 4 hours (or overnight) ensures the best texture.
How to Make This Recipe Even Easier
- Use a Pre-Made Crust: If you’re short on time, store-bought graham crackers or Oreo crusts work great as a shortcut.
- Make it No-Bake: Skip baking the crust and press it firmly into the pan before chilling. This makes the entire recipe a no-bake dessert.
- Use Store-Bought Whipped Cream: If you don’t want to whip your cream, you can use pre-made whipped topping—though homemade always tastes better!
Conclusion
There you have it—the ultimate guide to making a chocolate mousse pie that’s rich, creamy, and irresistible. Whether you stick to the classic recipe or experiment with flavors, this dessert is guaranteed to impress.
The best part? It’s easy to make and perfect for any occasion. From holiday celebrations to romantic dinners or casual gatherings, this pie is a foolproof crowd-pleaser.
Now that you have all the tips and tricks, it’s time to get baking! Try out the recipe, share it with family and friends, and don’t forget to experiment with your creative variations.
Enjoy every decadent bite! 🍫🥧
🍫 Chocolate Mousse Pie 🍫🍫
Ingredients
- For the crust:
- 1 1/2 cups chocolate cookie crumbs such as Oreos
- 1/4 cup sugar
- 1/2 cup unsalted butter melted
- For the mousse filling:
- 1 1/2 cups heavy cream
- 8 oz semi-sweet chocolate chopped
- 3 tablespoons powdered sugar
- 1 teaspoon vanilla extract
- 1/4 cup chocolate shavings optional, for garnish
Instructions
- 1- Preheat the oven to 350°F (175°C).
- 2- In a medium bowl, combine the chocolate cookie crumbs, sugar, and melted butter. Press the mixture into the bottom of a 9-inch pie dish.
- 3- Bake the crust for 8-10 minutes, then remove from the oven and let it cool completely.
- 4- For the mousse filling, melt the semi-sweet chocolate in a microwave-safe bowl or over a double boiler, stirring until smooth. Let it cool to room temperature.
- 5- In a separate bowl, whip the heavy cream and powdered sugar together until stiff peaks form.
- 6- Gently fold the melted chocolate and vanilla extract into the whipped cream until fully combined.
- 7- Spoon the mousse filling into the cooled crust and smooth the top.
- 8- Refrigerate the pie for at least 4 hours or overnight, until the mousse is set.
- 9- Garnish with chocolate shavings before serving.
- 10- Slice and enjoy your indulgent Chocolate Mousse Pie!