When cooking the perfect chicken, whether roasted, grilled, or fried, the secret lies in one often overlooked step: bringing. A simple chicken brine can transform your poultry into a juicy, flavorful masterpiece that keeps your family and guests returning for seconds. This article will guide you through everything you need to know about crafting the perfect chicken brine, from its benefits to expert tips for getting it just right.
Whether you’re a seasoned home chef or just starting in the kitchen, bringing is an easy yet powerful technique that elevates your cooking. Let’s explore why this technique is a game-changer for your chicken recipes.
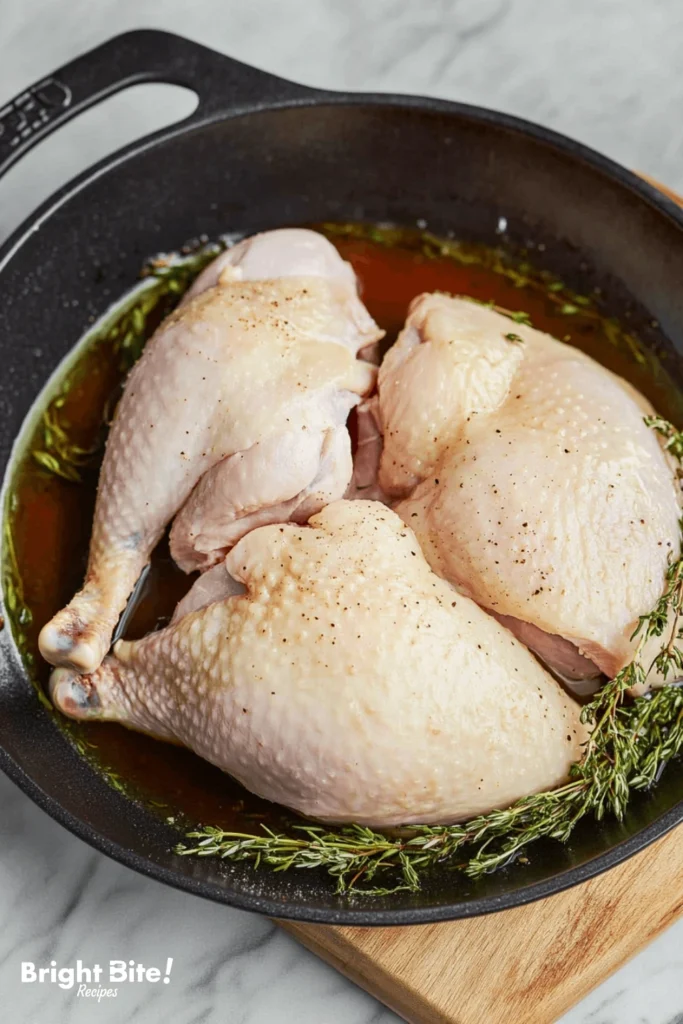
Table of Contents
Why You’ll Love This simple chicken brine recipe
There are countless reasons to love this simple chicken brine recipe. First and foremost, it’s easy to make with pantry staples. No fancy equipment or obscure ingredients are required—just a handful of basic items you likely already have at home. This incredibly versatile recipe allows you to customize it with your favorite herbs and spices for a unique flavor profile.
Brining locks in moisture, ensuring your chicken remains juicy, even when cooked at high temperatures. It also enhances flavor throughout the meat, so every bite is seasoned to perfection. Additionally, this method helps prevent overcooking, making it ideal for anyone who struggles with dry, bland chicken.
The best part? It’s quick to prepare, requiring just a few minutes of active work, while the brine does all the heavy lifting as the chicken soaks. This recipe is perfect for weeknight dinners, meal prep, or even impressing guests at your next gathering.
Detailed Ingredients and Instructions
Let’s break down the process of creating your brine step by step to ensure perfect results every time.

Ingredients in Detail
- Water: Acts as the brine base, dissolving the salt and carrying flavors into the chicken.
- Kosher Salt: The key to a good brine is that it enhances flavor and helps tenderize the meat.
- Sugar: While optional, sugar adds a touch of sweetness and aids in caramelization during cooking.
- Ice Cubes: Quickly cool the brine, ensuring it’s safe.
- Aromatics: Garlic, peppercorns, and herbs like rosemary or thyme infuse the chicken with subtle layers of flavor.
Step-by-Step Instructions
- Prepare the Base: Mix water, salt, and sugar in a medium saucepan. Heat gently while stirring to dissolve the salt and sugar completely. Avoid boiling, as this isn’t necessary.
- Cool the Brine: Remove the saucepan from the heat and let it cool slightly. Add ice cubes to speed up the cooling process, ensuring the brine reaches a safe temperature before adding the chicken.
- Submerge the Chicken: Place your chicken in a large bowl or resealable bag. Pour the cooled brine over it, ensuring the meat is fully submerged. If needed, weigh it down with a plate to keep it submerged.
- Refrigerate: Cover the container or seal the bag, then refrigerate for the recommended time:
- Boneless chicken breasts: 1-2 hours
- Bone-in thighs or drumsticks: 3-4 hours
- Whole chicken: 4-6 hours
- Rinse and Dry: After brining, remove the chicken from the brine and give it a quick rinse under cold water. Pat it dry with paper towels to remove excess moisture before cooking.
You’ll achieve tender, flavorful chicken every time by following these steps.
Tips, Variations, and Storage Options
There’s plenty of room for experimentation and optimization when making a simple chicken brine. Below are some helpful tips, creative variations, and storage solutions to make the most of your brining process.
Tips for Success
- Use the Right Salt: Always opt for kosher than table salt. Table salt is more concentrated and can result in overly salty chicken. If you must use table salt, reduce the quantity by half.
- Keep It Cool: Ensure the brine is completely cooled before adding the chicken. Using warm or hot brine can raise the chicken’s temperature to an unsafe level, promoting bacterial growth.
- Don’t Overbrine: While brining is great, too much of a good thing can lead to overly salty or mushy chicken. Stick to the recommended times based on the cut of meat.
- Use a Food-Grade Container: Choose a non-reactive bowl or resealable bag to hold the chicken and brine. Avoid aluminum, which can react with the salt and alter the taste.
- Add Aromatics Wisely: Avoid overwhelming the flavors while adding herbs and spices, which can elevate your brine. Start simple and adjust based on your preferences.
Variations for Flavorful Results
- Citrus Brine: Add orange or lemon slices for a refreshing citrus twist. Perfect for summer recipes or grilled chicken.
- Spicy Brine: Incorporate chili flakes, fresh jalapeños, or hot sauce for a hint of heat. This works wonderfully for fried chicken recipes.
- Herbal Infusion: Fresh herbs like rosemary, thyme, and sage lend an earthy, aromatic flavor. Combine with garlic cloves for an herbaceous boost.
- Sweet and Savory Brine: Balance saltiness with sweetness by adding a tablespoon of honey, maple syrup, or brown sugar.
- Asian-Inspired Brine: Use soy sauce, ginger, and a splash of rice vinegar for an umami-rich flavor profile that pairs well with stir-fries or teriyaki dishes.
Storage Options
- Refrigeration: If you prepare your brine in advance, store it in an airtight container for up to 3 days. Ensure it’s cooled completely before storing.
- Freezing: You can also freeze brine (without chicken) in a zip-top bag or airtight container for up to 2 months. Thaw it in the refrigerator before use.
You can customize your chicken dishes to suit any occasion or taste preference by trying different variations and storing your brine correctly.
Equipment Needed
Brining chicken doesn’t require much equipment, making it accessible for cooks of all levels. Below are the essentials:
- Medium Saucepan: For heating and dissolving the salt and sugar into the water.
- Mixing Bowl or Large Container: Use a non-reactive container, such as glass, plastic, or stainless steel, to hold the chicken and brine.
- Resealable Bags (Optional): These are ideal for smaller cuts of chicken, as they minimize the amount of brine needed and save fridge space.
- Measuring Cups and Spoons: To ensure accurate salt, sugar, and water measurements.
- Kitchen Towels or Paper Towels: These are used to pat the chicken dry after brining.
With these tools, you’ll be fully equipped to create a flavorful brine easily.
Frequently Asked Questions
Brining can seem intimidating at first, but it’s a straightforward process. Here are answers to some common questions about making a simple chicken brine:
1-How does brining work?
Brining works through osmosis. The salt in the brine draws moisture into the chicken while allowing flavors to penetrate deeply into the meat. This process helps the chicken retain moisture during cooking, producing juicy and tender meat.
2-Do I need to rinse the chicken after bringing it?
Yes, rinsing is recommended to remove excess salt from the surface of the chicken. However, pat it dry thoroughly afterward to avoid excess moisture that can interfere with browning during cooking.
3-Can I brine frozen chicken?
Absolutely! Just ensure the chicken is thawed slightly to absorb the brine effectively. Alternatively, use the brine as a thawing medium by placing frozen chicken directly into it.
4-What’s the difference between wet brining and dry brining?
Wet brining involves submerging the chicken in a saltwater solution, while dry brining involves rubbing the chicken with a salt mixture and letting it rest in the refrigerator. Both methods enhance flavor and moisture retention, but wet brining is preferred for whole chickens or large cuts.
5-Can I reuse brine?
No, it’s not safe to reuse brine. Once the chicken has been soaked, the brine is contaminated with raw meat juices and must be discarded.
6-Is brining necessary for all chicken recipes?
While brining is highly recommended for roasting or grilling, it may not be necessary for recipes with heavy marinades or sauces. However, it always enhances flavor and moisture, so it’s a great habit.

Related Recipes
If you’ve mastered the art of a simple chicken brine, there are countless ways to apply it across various recipes. Here are some related chicken recipes you’ll love, along with brief descriptions of why they’re worth trying:
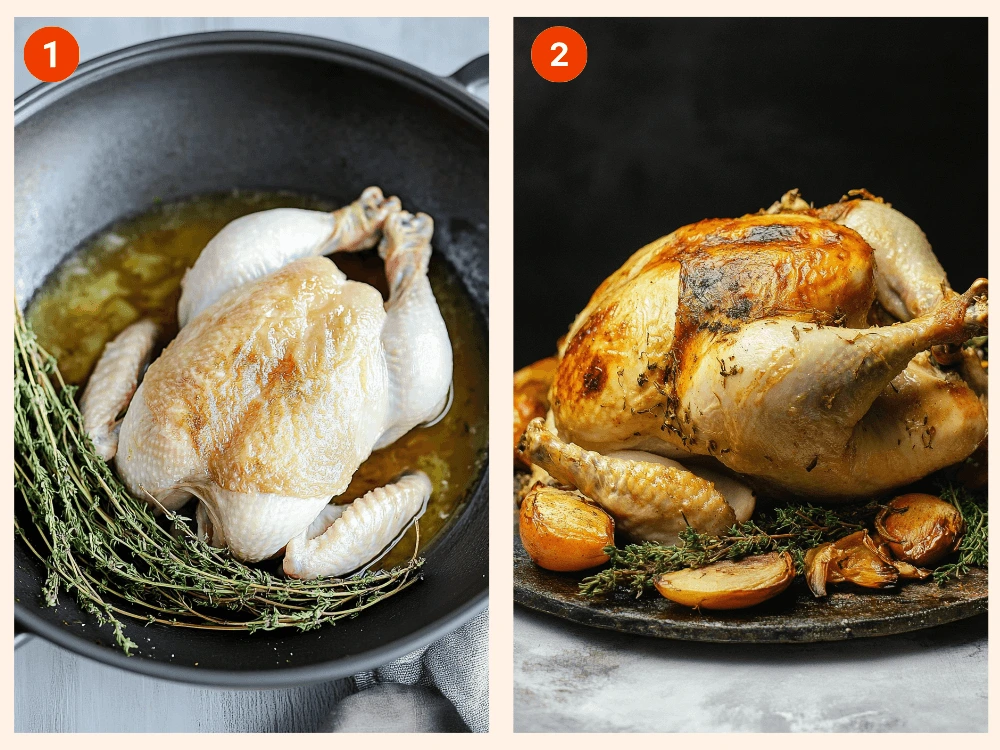
Herb-Roasted Whole Chicken
This recipe highlights how a perfectly brined whole chicken can become a show-stopping dinner centerpiece. The brine’s salt and herb infusion locks in moisture, while roasting brings out a crispy, golden skin.
Crispy Fried Chicken
Transform brined chicken pieces into a Southern classic with this crispy fried chicken recipe. The brine ensures the meat stays moist and flavorful under its crunchy, seasoned crust.
Lemon Garlic Grilled Chicken Breasts
Pair your brined chicken breasts with a tangy lemon garlic marinade before throwing them on the grill. The result is a juicy, smoky dish perfect for summer cookouts.
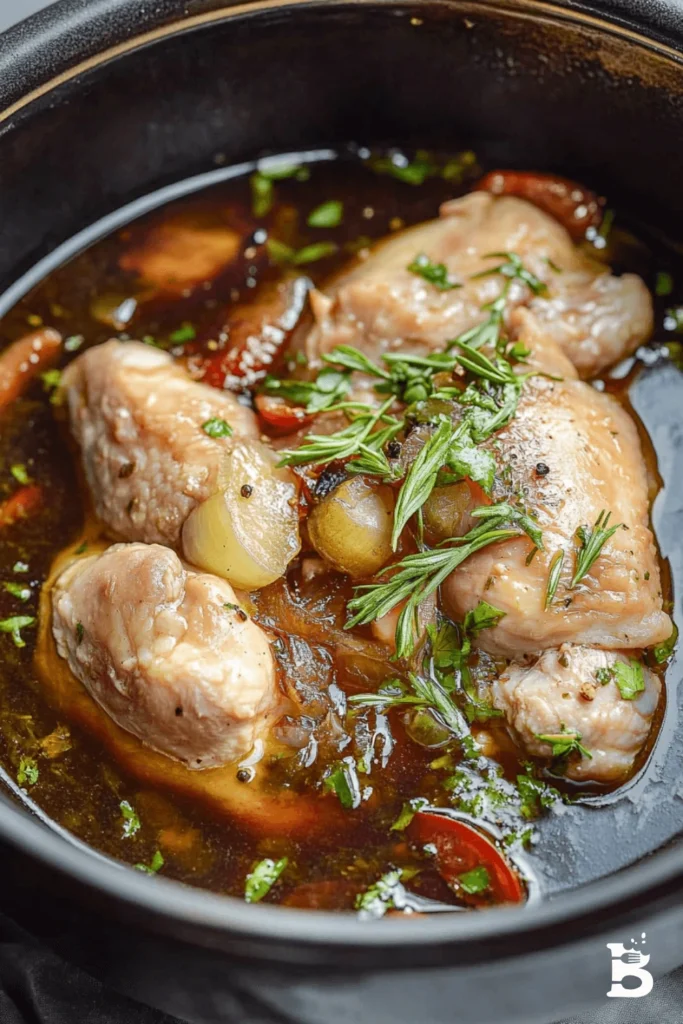
Chicken Noodle Soup
Using brined chicken in soup adds depth to the broth and ensures the meat remains tender and juicy even after simmering.
Honey Garlic Chicken Thighs
A sweet, savory glaze elevates these brined chicken thighs into a sticky, caramelized delight. Serve them with steamed rice or a crisp salad for a balanced meal.
These recipes demonstrate how a simple step like brining can amplify the flavor and texture of your favorite chicken dishes.
Pairing/Serving Suggestions
A simple chicken brine transforms your chicken into a versatile dish that pairs beautifully with a variety of sides, drinks, and desserts. Here are some ideas to help you build a complete meal around your perfectly brined chicken:
Side Dishes
- Roasted Vegetables: The caramelized flavors of roasted carrots, potatoes, or Brussels sprouts complement the juicy chicken.
- Creamy Mashed Potatoes: A classic pairing, the smooth texture and buttery flavor balance the savoriness of the chicken.
- Garlic Butter Rice: Fluffy, flavorful rice makes a perfect base for any chicken dish, soaking up the juices beautifully.
- Fresh Garden Salad: Add a light, refreshing contrast with a salad featuring mixed greens, cucumbers, and a zesty vinaigrette.
Drinks
- Crisp White Wine: A Chardonnay or Sauvignon Blanc pairs well with the subtle flavors of brined chicken.
- Iced Tea: Sweetened or unsweetened, it’s a classic non-alcoholic option that complements most chicken dishes.
- Craft Beer: Opt for a light lager or pale ale to balance rich chicken flavors.
Desserts
- Lemon Bars: Their tartness cuts through the savory richness of brined chicken dishes.
- Apple Pie: A comforting and slightly sweet dessert to round out the meal.
- Vanilla Bean Panna Cotta: Light and creamy, it’s an elegant finish to a chicken dinner.
You’ll create a meal that satisfies every palate by pairing your brined chicken with these accompaniments.
Nutrition Information
When you brine chicken, the process can slightly affect its nutritional content. Below is an overview of the nutritional facts for a serving of brined chicken (4 ounces):
- Calories: Approximately 140
- Protein: 26 grams
- Fat: 3 grams
- Carbohydrates: 0 grams
- Sodium: Varies depending on brine concentration but typically ranges between 250-400 mg per serving
Key Points to Note:
- Brining enhances the flavor without adding significant calories or fat.
- If you’re watching your sodium intake, adjust the amount of salt in the brine or reduce brining time.
- Using aromatics like garlic and herbs adds flavor without impacting nutritional values.
Remember that the final nutritional profile can vary based on cooking methods and additional seasonings or sauces.
Seasonal and Occasion Variations
Adapting your simple chicken brine for different seasons or special occasions is easy and fun. Here are a few ideas to keep your chicken dishes fresh and festive year-round:
Seasonal Variations
- Spring: Add fresh herbs like dill and parsley, along with a splash of white wine vinegar, for a bright, zesty flavor.
- Summer: Include citrus slices (lemon, lime, or orange) and fresh rosemary for a vibrant and refreshing brine, perfect for grilling.
- Fall: Incorporate warm spices like cinnamon, cloves, and nutmeg for a brine that complements roasted chicken and hearty side dishes.
- Winter: Use garlic, thyme, and a pinch of cayenne pepper to create a cozy, comforting flavor profile ideal for cold evenings.
Occasion Variations
- Thanksgiving: Infuse your brine with sage, apple cider, and black pepper to create a festive chicken recipe that rivals traditional turkey.
- BBQs and Picnics: A brine with honey, mustard seeds, and chili flakes adds a sweet and spicy kick to your grilled chicken.
- Romantic Dinners: Use a simple yet elegant brine with white wine, bay leaves, and garlic to create a dish that pairs beautifully with candlelight.
- Family Gatherings: Opt for a classic herb-and-garlic brine that appeals to all ages and complements a variety of sides.
By tailoring your brine to the season or occasion, you’ll always have a recipe that feels fresh and exciting.
My Recipe Tips
Brining may seem straightforward, but a few pro tips can help you avoid common mistakes and ensure your chicken turns out perfect every time. Here’s how to make your simple chicken brine foolproof:
Pro Tips for the Perfect Brine
- Measure Ingredients Accurately: A proper salt-to-water ratio is crucial for the success of your brine. Stick to the recommended amounts, especially if you’re new to brining.
- Use Ice Cubes to Cool Quickly: After heating the brine to dissolve the salt and sugar, add ice cubes instead of waiting to cool naturally. This saves time and ensures your chicken is safe to brine.
- Don’t Skip the Rinse: While it may seem unnecessary, rinsing the chicken after brining removes excess salt on the surface, preventing overly salty meat.
- Dry Thoroughly: Pat the chicken dry with paper towels before cooking to help it achieve a beautifully golden, crispy exterior.
- Experiment with Flavors: Once you’re comfortable with the basic brine recipe, don’t hesitate to experiment. Aromatics like citrus peels, whole spices, or tea leaves can add a unique touch.
- Brine Ahead of Time: If you’re planning a large meal, brine the chicken the night before to save time on the cooking day.
Mistakes to Avoid
- Overbrining: Leaving the chicken in the brine for too long can result in mushy or overly salty meat. Stick to the recommended times.
- Using Table Salt Without Adjustments: Table salt is more concentrated than kosher salt. If you use it, reduce the quantity by half to avoid oversalting.
- Bringing in a Reactive Container: Avoid aluminum or copper containers, as they can react with the salt and affect the brine’s flavor.
By keeping these tips in mind, you’ll master the art of consistently serving juicy, flavorful, and perfectly seasoned chicken.
Conclusion
A simple chicken brine is the ultimate secret weapon for anyone looking to elevate their chicken recipes. Whether roasting a whole bird, grilling breasts, or frying thighs, this easy technique guarantees moist, flavorful results every time. You can transform ordinary chicken into a delicious dish with just a few ingredients and a little preparation.
Brining is a versatile method that’s easy to customize to your tastes and cooking style. Plus, it’s a great way to experiment with new flavors and impress your family or guests with culinary skills. The beauty of bringing lies in its simplicity—it doesn’t require fancy equipment or hard-to-find ingredients, making it accessible for everyone.
Now that you’ve learned the ins and outs of bringing, it’s time to put this knowledge to use in your kitchen. Try this technique with one of the above-related recipes, or get creative with your brine variations. No matter how you use it, a simple chicken brine will become a staple in your cooking repertoire.
Happy cooking!

🍗 Simple chicken brine 🧂✨🍋
Ingredients
- 8 cups 2 liters water,
- 1/4 cup kosher salt
- 1/4 cup granulated sugar optional for added flavor,
- 3 garlic cloves smashed,
- 1 teaspoon black peppercorns
- 2 bay leaves
- Optional: fresh herbs like rosemary thyme, or parsley,
- Optional: 1 lemon sliced.
Instructions
- Prepare the brine:
- In a large pot, combine the water, kosher salt, and sugar (if using). Stir over medium heat until the salt and sugar are fully dissolved.
- Add aromatics:
- Remove the pot from heat and add the garlic, peppercorns, bay leaves, and any optional herbs or lemon slices. Allow the mixture to cool completely to room temperature.
- Chill the brine:
- Once cooled, transfer the brine to the refrigerator until it is cold.
- Brine the chicken:
- Place your chicken (whole or pieces) in a large container or resealable plastic bag. Pour the cooled brine over the chicken, ensuring it is fully submerged.
- Cover and refrigerate for 2-6 hours (up to 12 hours for larger pieces or a whole chicken).
- Rinse and dry the chicken:
- Remove the chicken from the brine and rinse thoroughly under cold water to remove excess salt. Pat dry with paper towels before cooking.
- Cook and enjoy:
- Cook the chicken using your preferred method—roast, grill, or fry—and enjoy juicy, flavorful results!